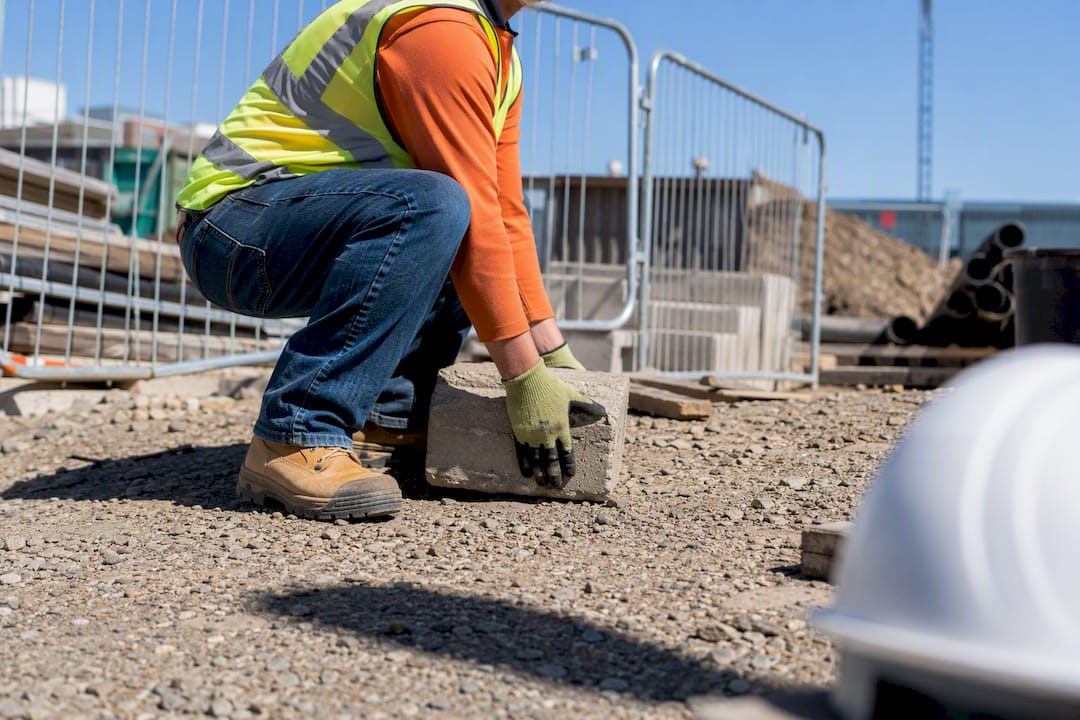
Safe lifting practices are the sequence of stance, spine position, and leg-driven movement that keeps a load’s weight close to your center of gravity instead of loading it onto your lower back. The single most important rule, backed by guidance from the HSE, Singapore’s Ministry of Manpower, and occupational health researchers cited by MedlinePlus, is simple: keep the load close and let your legs do the work, not your spine.
The core sequence breaks into five moves:
- Plan the lift before you touch the load, checking weight, path, and destination.
- Set your stance with feet shoulder-width apart, one slightly forward.
- Bend at the hips and knees, not the waist, keeping your back in its natural alignment.
- Grip firmly and pull the load close to your torso before lifting.
- Drive up through your legs, and pivot your feet instead of twisting your spine.
Key Takeaways
Safe lifting works when workers keep the load close to the body, bend at the hips and knees rather than the waist, and lift with the legs while employers prioritize eliminating or engineering out the hazard before relying on technique alone.
| Point | Details |
|---|---|
| Keep the load close | Distance from your body multiplies spinal leverage, so a tight grip against the torso cuts strain the most. |
| Stay in the optimal zone | Lift and carry between mid-thigh and mid-chest height whenever possible to minimize injury risk. |
| Follow the hierarchy of controls | Eliminate or engineer out the lift before falling back on training and technique. |
| Watch for red flags | Sharp pain, numbness, or inability to bear weight after a lift means stop and get medical follow-up. |
| Partner with a QES specialist | Com supports training, audits, and Design for Safety work that reduce manual handling risk site-wide. |
Table of Contents
- Why Safe Lifting Practices Matter for Injury Prevention
- What Is the Step-by-Step Safe Lifting Technique?
- What Is the Optimal Lifting Zone?
- Planning the Lift and Choosing the Right Handling Aids
- How Should Employers Manage Manual Handling Risk?
- Do Warm-Ups and Personal Factors Change Safe Lifting Guidance?
- What Are the Most Common Lifting Mistakes?
- A Quick Workplace Checklist for Toolbox Talks
- What to Do If a Lifting Injury Happens on Site
- How MOSAIC Supports Safer Manual Handling on Site
- Frequently Asked Questions
- Sources
Why Safe Lifting Practices Matter for Injury Prevention
Manual handling injuries remain one of the most common causes of lost workdays on construction sites and in warehouses, and the mechanism behind most of them is leverage, not brute force. Every inch a load moves away from your body multiplies the torque your spinal discs and lower back muscles have to absorb. UCLA’s ergonomics program explains that a load held at arm’s length can feel dramatically heavier than the same weight held tight to the chest, because the spine is acting as a lever with the load at the far end.
That’s why the back, rather than the shoulders or arms, absorbs most of the damage in a bad lift. Workers over 40, anyone with a prior back injury, and staff doing repetitive handling face measurably higher risk, according to MedlinePlus. For these groups:
- Lower the weight and frequency thresholds you’d otherwise use for a healthy adult.
- Prioritize mechanical aids over manual technique alone.
- Flag any history of back injury during onboarding so supervisors can adjust task assignments.
What Is the Step-by-Step Safe Lifting Technique?
Before anyone bends down, the lift needs a plan. Test the load’s weight with a small push or lift attempt, clear the path of clutter and trip hazards, and decide up front whether you need a hand truck, a second person, or a team lift. This ten-second habit prevents the improvisation that causes most awkward, injury-prone lifts.
Once you’ve cleared the path, the physical sequence looks like this:
- Position your feet shoulder-width apart, with one foot slightly ahead for balance, facing the load directly.
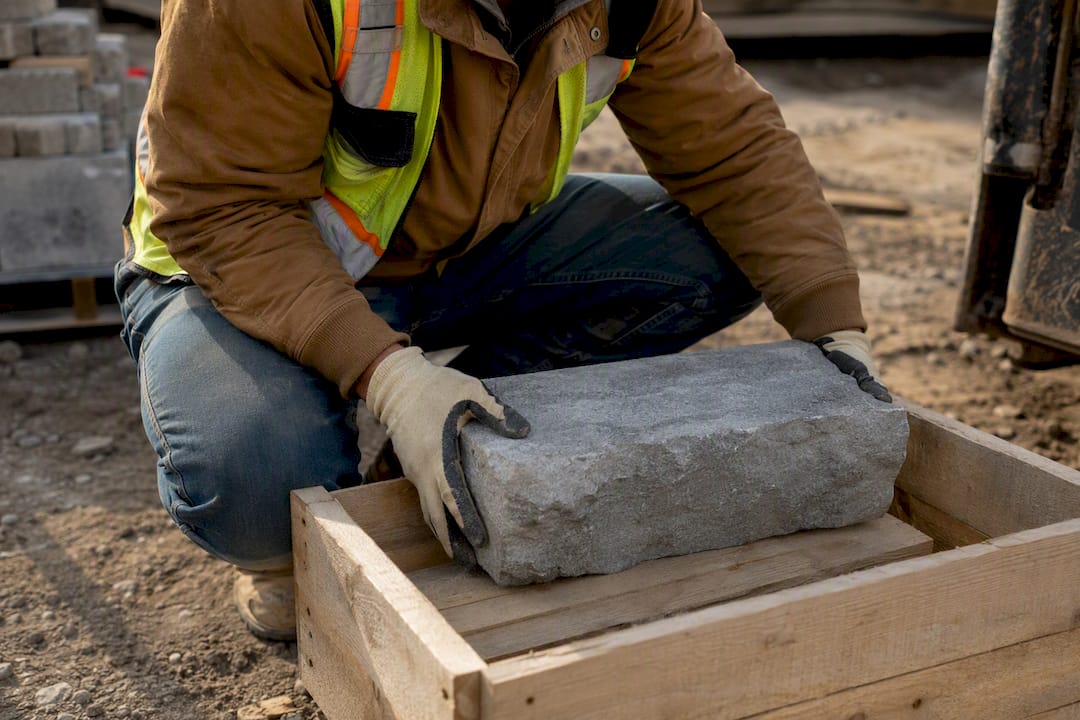
- Bend at the hips and knees, not from the waist. HSE guidance notes you don’t need a full deep squat, just enough hip and knee bend to keep your spine’s natural arch intact.
- Get a firm, secure grip on the load, using handles or the base corners where possible.
- Pull the load in against your body before you start lifting, not after.
- Straighten your legs to lift, keeping your back straight and the motion smooth rather than jerky.
- Move your feet to turn toward your destination. Never twist your torso while carrying weight.
- Set the load down by reversing the sequence: bend at the hips and knees, and lower it with your legs.
A few habits separate a clean lift from a risky one. Keep the load within the vertical range generally recommended between mid-thigh and mid-chest height throughout the carry. Avoid any sudden, jerking motion when you initiate the lift. And if the destination is more than a few steps away, don’t try to power through in one go.
Pro Tip: On longer carries, use a bench, cart edge, or table to rest the load mid-route and reset your grip. Momentarily setting it down beats fighting fatigue for the last twenty feet.
What Is the Optimal Lifting Zone?
The optimal lifting zone runs from mid-thigh to mid-chest height. MOM guidance treats this zone as the safest range for both picking up and setting down loads, because it minimizes the distance the spine has to compensate for. Lift from the floor or reach above shoulder height, and the injury risk climbs sharply, a point CCOHS also flags when recommending that workers raise the load’s starting point or lower the shelf instead of stretching for it.
Guideline weight figures work as filters, not fixed safe limits; the actual ceiling depends on posture, frequency, and the worker.
| Vertical zone | Relative guideline weight | Why |
|---|---|---|
| Mid-thigh to mid-chest | Highest guideline weight | Shortest lever arm, spine under least strain |
| Below mid-thigh (near floor) | Reduced guideline weight | Requires deeper bend, more leverage stress |
| Above mid-chest (shoulder height or higher) | Reduced guideline weight | Limits control and raises shoulder/spine load |
Several factors push the safe weight even lower than the zone alone suggests:
- Arms extended away from the body.
- Frequent or repetitive lifts within a shift.
- Awkward or unstable grips, including bulky or unbalanced loads.
- Tasks that call for a two-person or team lift instead of solo handling.
- Workers with prior injuries or reduced physical capacity.
Planning the Lift and Choosing the Right Handling Aids
A good pre-lift check takes seconds but eliminates most of the surprises that cause strains: test the actual weight before committing, clear the path of cords, debris, or uneven flooring, confirm lighting is adequate, and make sure you can see over or around the load while carrying it.
When a lift exceeds a comfortable guideline weight or the zone forces an awkward posture, reach for equipment instead of muscling through it. Common options include:
- Dollies and hand trucks for boxed or palletized goods over short distances.
- Pallet jacks for heavier palletized loads on flat, clear flooring.
- Lift tables to raise or lower a load into the optimal zone before handling.
- Hoists or lifting machines for loads beyond safe manual limits altogether.
Check wheels, brakes, and handles before each use, and tag out any aid with a cracked frame, seized wheel, or failing brake rather than working around the fault. A site manager’s ergonomics guide walks through these pre-lift checks in more detail for construction crews.
How Should Employers Manage Manual Handling Risk?
Technique training matters, but it sits at the bottom of the hierarchy of controls, not the top. The sequence employers should follow, per HSE’s Manual Handling Regulations guidance, runs: avoid the manual lift entirely where feasible, assess the risk of any lift that remains, then reduce that risk to as low as reasonably practicable through engineering or administrative measures before falling back on PPE and training.
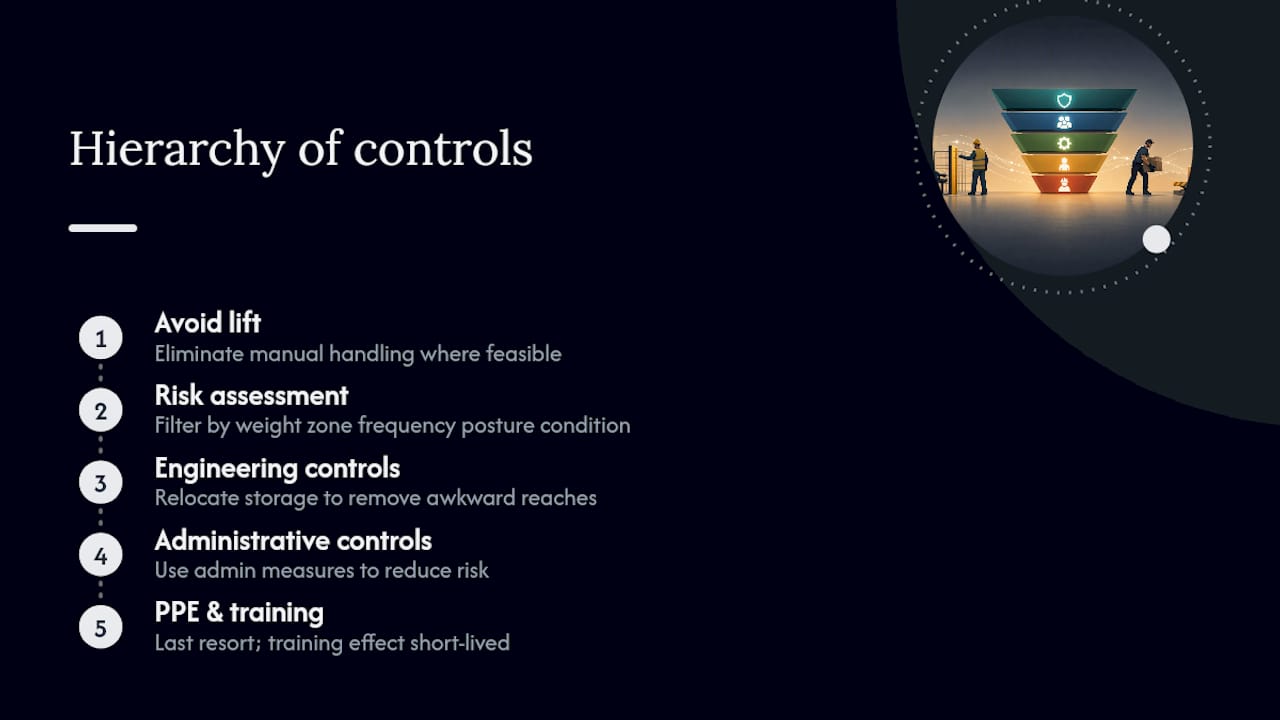
In practice, that means a proper risk assessment filters tasks by weight, vertical zone, frequency, posture, and the individual worker’s condition, then escalates anything that fails the filter to mechanical assistance rather than a training refresher. Design changes, like relocating storage to eliminate awkward reaches, often remove the hazard permanently. Training alone changes behavior for a shift or two; engineering controls change it for good.
Do Warm-Ups and Personal Factors Change Safe Lifting Guidance?
A short dynamic warm-up before repetitive or heavy handling tasks reduces strain risk, according to WSH occupational guidelines, similar to how athletes prepare before exertion. Five minutes of light movement and stretching primes muscles that are otherwise cold at the start of a shift.
- Rotate shoulders, hips, and knees through their range of motion.
- Do a few bodyweight squats to activate the legs before the first heavy lift.
- Set individual weight and frequency limits lower for older workers or anyone with a prior back injury.
- Refer persistent discomfort to occupational health or physical therapy rather than pushing through it.
What Are the Most Common Lifting Mistakes?
Most lifting injuries trace back to a handful of repeated errors: a rounded back instead of a neutral spine, reaching for a load at arm’s length, twisting the torso mid-lift, jerking the load up instead of moving smoothly, and dropping into a deep, unsupported stoop.
Watch for these warning signs during or after a lift:
- Sharp, sudden pain in the back or legs.
- Numbness or tingling radiating down a limb.
- Inability to bear weight or stand upright normally.
- Any noticeable change in mobility hours after the task.
If any of these appear, stop, set the load down safely, report the incident, and get first aid or medical follow-up if symptoms don’t clear quickly.
A Quick Workplace Checklist for Toolbox Talks
Run this filter before any lift: task risk (weight, zone, frequency), equipment readiness, a clear route, a quick warm-up, and a decision on whether it needs a team lift or mechanical aid. Close with a reminder on reporting near-misses.
A trainer script that fits inside three sentences: “Before you lift anything today, ask yourself three things: is the path clear, is the load in the zone between your thigh and chest, and can you keep it close to your body the whole way? If any answer is no, get help or grab equipment. The one rule that matters most: legs lift, back holds.”
Run this as a five-minute toolbox talk weekly, and pair it with hands-on supervised practice during onboarding, since CCOHS notes that written guidance alone rarely changes behavior on variable, real-world tasks. A construction onboarding checklist offers a useful template for folding this into new-hire induction.
What to Do If a Lifting Injury Happens on Site
The first move is to stop the task immediately and prevent further loading of the injured area. Don’t let the worker try to “walk it off” or finish setting down a load if they’ve felt a sharp pull or sudden pain. Help them lower the load safely or, if it’s already on the ground, leave it in place.
Get the worker to a stable, safe position, sitting or lying down as comfortable, and avoid twisting or bending the affected area further. Check for the red flags covered earlier: numbness, tingling, inability to bear weight, or visible deformity. Any of these warrants immediate first aid response and a call for medical evaluation rather than a wait-and-see approach.
Report the incident through your site’s standard process right away, while details are fresh. This isn’t just paperwork. It feeds directly back into the risk assessment cycle, flagging whether the task, the load, or the environment needs a control upgrade. A pattern of near-misses or minor strains tied to the same task is often the clearest signal that manual handling needs an engineering fix, not another reminder about technique.
Keep the injured worker away from further handling duties until a medical provider clears them, and document the return-to-work plan if restrictions apply. For sprains or strains that seem minor, still recommend a same-day or next-day check-in, since some soft-tissue injuries worsen over 24 to 48 hours. Sites with a clear, rehearsed response protocol, rather than an improvised one, get workers appropriate care faster and reduce the chance a minor strain turns into a prolonged absence.
A Consultant’s View From the Field
The correction I make most often on-site isn’t stance or grip. It’s distance: workers reaching a foot past where the load actually needs to sit before they start lifting. Close that gap, and half the strain complaints disappear.
How MOSAIC Supports Safer Manual Handling on Site
Getting technique right on paper is one thing. Embedding it across a live construction site, with rotating crews, variable loads, and shifting schedules, is where most safety programs actually break down. Com works with construction companies to close that gap through hands-on training, on-site audits, and risk assessments that go beyond a checklist exercise.

Where manual handling can’t be eliminated through better sequencing alone, Com’s Design for Safety advisory looks at the problem earlier, at the layout and process design stage, rather than trying to train around a hazard that could have been engineered out. ConSASS assessments and ongoing compliance support round out the picture for teams working toward BizSAFE or ISO certification. If your site needs a practical review of lifting risks or a toolbox-ready training session, find out who needs Design for Safety and get a consultation booked.
Frequently Asked Questions
What is the single most important rule in safe lifting practices?
Keep the load as close to your body as possible and lift using your legs, not your back. Distance from your center of gravity is what turns a manageable weight into a spinal hazard.
What is the optimal lifting zone?
The safest vertical range runs from mid-thigh to mid-chest height. Lifting from the floor or above shoulder height increases strain even for lighter loads.
Is there a universal safe weight limit for manual lifting?
No. Guidance uses weight filters tied to posture, zone, and frequency rather than one fixed number, since individual capacity, grip, and task conditions all change the real risk.
When should a lift be handled by a machine instead of a person?
When the load exceeds a comfortable guideline weight, requires an awkward reach, or falls outside the optimal zone, mechanical aids or a team lift should replace a solo manual attempt.
What should happen immediately after a lifting injury on site?
Stop the task, help the worker into a safe position, check for red flags like numbness or inability to bear weight, and report the incident so the underlying risk gets reassessed.
Sources
- Manual handling at work: Good handling technique
- Safe lifting | Ergonomics (UCLA)
- Lifting and bending the right way: MedlinePlus Medical Encyclopedia